PLEASE READ AFFILIATE DISCLOSURE
“Cornhole is one of those games that brings folks together for a whole lot of fun, especially once fall hits.”
Imagine cool afternoons, pumpkin spice in the air, and laughter as you and your friends toss bean bags for glory. Building your own set can add a personal touch to these gatherings, making everything just a tad more special.
Creating a DIY cornhole set doesn’t just save a few bucks. It’s a blank canvas for creativity. You decide what it looks like, how it flaunts your style, and it’s a chance to flex those crafting muscles you might not even know you had. Plus, the pride of showing off something you built with your own two hands? Pretty unbeatable.
Cornhole has been hanging around backyards and tailgate parties forever, it seems. It has roots going all the way back to 14th-century Germany or maybe somewhere in the Midwest in the 1880s—depends on who you ask. But the game we know today picked up steam across the United States in the latter half of the 20th century, rising from family barbecues to serious sporting competitions.
So, why not tap into tradition and start your own cornhole revolution right in your backyard? With just a few supplies and a little elbow grease, you’ll be on your way to fun times under the October sky.
Materials Needed for Building a Cornhole Game Set
Getting started on your DIY cornhole game set means gathering the right materials. The good news? Most of what you need is pretty straightforward, and you might already have some of it stashed in the garage or basement.
Plywood is king when it comes to the board surface. A 4×2 foot piece of half-inch plywood makes the ideal top. Not too light, not too heavy, just right for that perfect bounce. For the frame, a few 2x4s will do the trick. Keep things simple, and go for straight, smooth pieces to avoid any bothersome splinters.
Wood screws are your trusty sidekicks in this project, holding everything together. Grab a pack of 1-1/2 inch wood screws and maybe a little wood glue for good measure, especially around the frame edges, to fend off any shifting after some hearty gameplay.
Sandpaper is key for smoothing out those rough edges. Aim for something like 120-grit to start, then polish up with 220-grit for that professional feel. Paint or wood stain comes next, and here’s where you really get to have some fun. Pick a fall theme or your favorite colors. Don’t forget a bit of weatherproof poly to keep it looking sharp after those dewy morning games.
When you’re stocking up, think about finding sustainable options. Look for FSC-certified plywood or recycled materials if you can. It’s a small step, but it adds a nice layer of eco-friendliness to your project.
For those on a tight budget, no problem—check out local lumber yards, big box stores, or even places like Craigslist and Facebook Marketplace for leftover wood and materials. Sometimes folks have just enough lying around from other projects, and they’re happy to let it go for cheap, or even free.
Tools Required for Construction and Assembly
Once you’ve got your materials, it’s time to tackle the tool situation. There’s no need to go all out with fancy gadgets. A basic toolbox will do the job just fine for building a cornhole set.
Start with a good power drill. This is your go-to for drilling holes and sinking those screws snugly into your boards. If you’re borrowing from a buddy, make sure you get a few different drill bit sizes to play with.
A saw is the next biggie. A circular saw works great for cutting your plywood and 2x4s to the perfect size. Don’t have a saw? No sweat—many hardware stores will cut the wood for you, often free or for a small fee.
Bring out a sturdy measuring tape to keep all your pieces in check. Accuracy here saves headaches later. You’ll also want a pencil for marking cuts and drill points.
Don’t forget about paintbrushes or rollers if you’re planning to paint your boards. Brushes give a bit more control for any designs or touch-ups around the edges.
Safety first, too! Knock on some safety glasses and maybe even some gloves, particularly if you’re not used to handling power tools. They’ll keep those beautiful peepers and fingers of yours safe.
And if you’re looking to keep costs and clutter down, consider checking out a local tool library. Many neighborhoods have co-ops where you can borrow tools for a small fee or even for free, which is perfect if you’re short an item or two.
Step-by-Step Guide for Building Your Cornhole Boards
Let’s get into the nitty-gritty of putting your cornhole boards together. It all starts with cutting your plywood and 2x4s to the right specifications. The regulation size is 4 feet by 2 feet, so ensure your cuts are clean and precise.
Start with the frame. Arrange your 2x4s into a neat rectangle that will support your board from underneath. Pre-drill holes before driving in screws—this helps avoid any annoying splits in the wood. A bit of wood glue at the joints wouldn’t hurt either, making the whole thing feel sturdier.
Attaching the plywood sheet comes next. Lay your plywood on top of the frame, double-check everything is flush at the edges, and screw it down. The general rule is about 8 screws, evenly spaced, to ensure a firm hold.
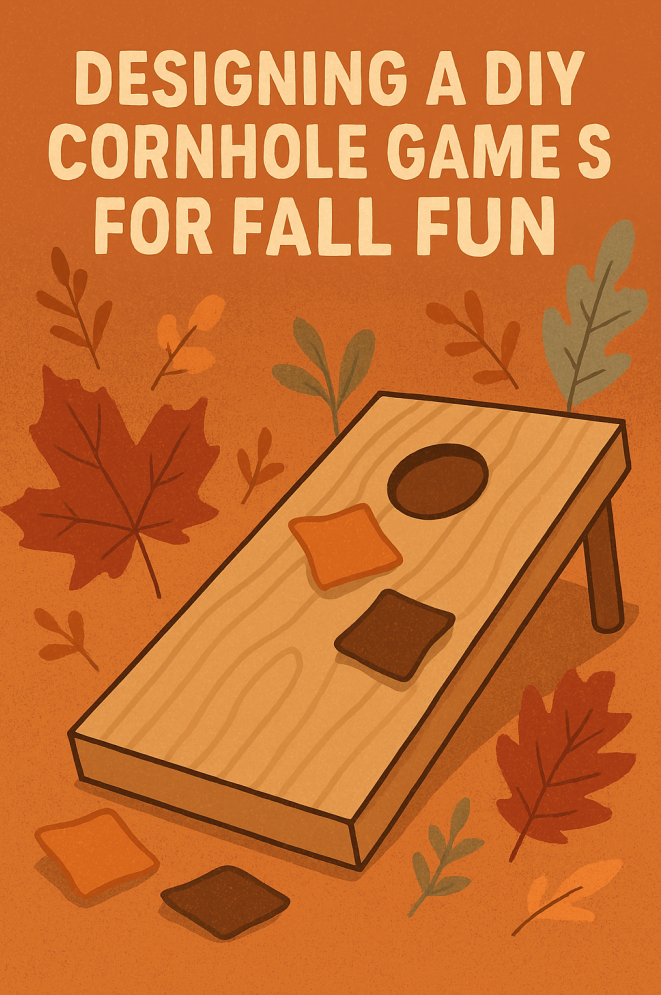
Remember, the iconic cornhole board has a hole. Measure 9 inches down from the top edge and center it exactly width-wise. A 6-inch diameter works just right for those bean bags. Cutting this out might require a jigsaw or keyhole saw.
After cutting, it’s time to ease up any sharp edges with your sandpaper. Give those corners and holes a good once-over to prevent any snagged clothes or scratches when the games begin.
Avoiding errors is important. Common mistakes include not measuring twice before cutting or using too few screws on the plywood. A helpful trick is to clamp down your boards to a workbench while working to keep everything stable and reduce wobbles.
Finally, make adjustments for leg attachments. Cut additional 2×4 pieces for legs that will prop up the board at about a 12-degree angle. This is where a bit of trial and error comes in, as you want those boards to sit perfectly level with the ground when angled.
Creating Eye-Catching Designs and Themes
Now that you’ve got the base of your cornhole boards ready, it’s time to let your inner artist shine. A bit of paint and creativity can transform those plain boards into standout pieces of art that reflect personal style or favorite themes.
Fall presents the perfect opportunity to embrace the warmth of the season with leafy patterns, pumpkins, or even a nod to your favorite autumn sports team. Stencils can be a huge help if freehand painting isn’t your strength. They’re available at craft stores and online, offering everything from simple shapes to complex patterns.
Consider using outdoor-grade paints. They’ll endure the elements and keep your masterpieces looking fresh game after game. Whether you’re all about bold, bright hues or prefer a more rustic, weathered look with wood stain, there’s really no limit here. Darker colors can pop on a lighter background while a classic checkerboard might speak to the traditionalists.
If long-lasting shine is your thing, a clear coat of polyurethane after everything’s dried will provide that extra protection against scuffs and spills. And hey, don’t forget about the board legs — giving them a lick of paint or stain really ties the whole project together.
For those who’d rather not tackle this part solo, think about collaborating with a local artist or friend who has a knack for design. This adds another layer of personalization, not to mention making the entire process a shared experience.
At the end of the day, the designs are all about expressing what cornhole means to you and having fun while you’re at it. Once finished, give your boards a solid couple of days to dry and set before jumping into your first game to ensure everything’s ready to go.
Crafting the Perfect Bean Bags
To complete your cornhole setup, you’ll need some sturdy bean bags. These little bags are what really make the game tick, and crafting them can be a fun, simple addition to your project.
The standard size for a cornhole bean bag is about 6×6 inches, and typically, they’re filled with about a pound of corn feed. There’s a great old-school charm to this, but synthetic alternatives like plastic pellets work too, especially if you want weather resistance.
Fabric selection is where you can flex a bit of style. Duck cloth is a popular choice for its durability and nice weight. Just make sure whatever you pick is tough enough to withstand countless throws without tearing.
Not everyone has a sewing machine sitting around, but hand-stitching is completely doable. You’ll want to double up the seams for extra strength. Alternatively, for those who’d rather skip the sewing altogether, there are plenty of options available online or at sporting goods stores.
Ensure you fill the bags evenly. Fluffier bags don’t throw as well, so aim for a solid fill to make sure they land properly on the boards. It’s a good idea to make and test a single bag before committing to the entire batch, adjusting the weight and fill until it feels just right.
To prolong their lifespan, store your bean bags in a dry place when not in use. If you used corn feed, keep in mind that moisture can be an issue, leading to mold or critters trying to snack on them. A quick shake and a nice, dry spot should do the trick.
To sum it all up, these bean bags are the heart of the game, so making them well is worth the effort. The little details, from stitching to stuffing, all contribute to how they feel when tossed and when they hit your boards.
Tips for Organizing a Fall Cornhole Tournament
Once your cornhole set is ready to roll, hosting a fall tournament is a great way to show it off while bringing together friends, family, and maybe even neighbors for some friendly rivalry. Consider the space available in your yard or community park to set up your boards so there’s plenty of room for players and spectators.
Create a tournament bracket if you’re expecting a crowd. This keeps things organized and gives everyone a fair shot. Use online tools for digital brackets, or keep it classic with a giant board where players can visually follow match progress.
Set the mood with some fall-themed decorations. Think hay bales for seating, eucalyptus garlands, and maybe even some pumpkin centerpieces. Not only will they beautify the surroundings, but they’ll also offer some great photo ops.
Don’t shy away from mixing things up with thematic rules or challenges. You could introduce a fall trivia game between rounds or have themed rounds where players have to throw under different conditions.
Keep everyone fueled with seasonal snacks like caramel apples, pumpkin bread, or warm apple cider. Easy DIY snack stations can keep the vibe cozy and community-driven.
Even a casual cornhole tourney can benefit from a little flair. Consider small prizes for the top teams. They could be as simple as a homemade trophy, a quirky fall-themed item, or even a gift card to a local eatery.
Adding a bit of entertainment between games keeps spirits high. Think about incorporating music to match the fall mood or inviting a local musician if possible. This not only entertains but also supports local artists.
Lastly, take advantage of social media by creating a hashtag for the event. Encourage participants to snap photos, share their highlights, and spread the word about the great time they had, making it an annual get-together that grows year after year.
Conclusion: Cherishing Homemade Fun with Friends and Family
Building your own cornhole set and watching it come alive with games and laughter is something special. It’s not just about having a game to play—it’s the memories and connections made along the way that make it all worthwhile.
Engaging in DIY projects like this nurtures creativity and brings people together in a way store-bought items just can’t match. Every toss of the bean bag, every laugh shared, and every friendly competition adds a layer of importance to what you’ve created.
Share your creation journey on social media feeds or with friends to inspire others. Maybe you’ve got a knack for design or some handy tips that’ll help someone else craft their own board. It’s a great way to contribute to the larger DIY community and keep the spirit of sharing alive.
Ultimately, the joy of playing on a set you built yourself adds an extra dose of pride and satisfaction to your outdoor gatherings. Whether it’s competing for bragging rights or casually playing under the fall sun, these moments become cherished stories told again and again at family dinners and reunions.
Enjoy the fruits of your labor, revel in those good times, and maybe even start planning how you’ll upgrade or redesign your boards next season.
Appendix: Handy Resources and Final Tips
To round things out, here’s a handy appendix to keep your cornhole project smooth and successful. This is where you’ll find extra tips, resources, and tricks to really polish up your DIY adventure.
When it comes to cutting wood precisely, a guide rail for your saw can do wonders for those crisp edges. If you’re renting tools, don’t hesitate to ask the store for a quick demo—they’re usually more than happy to oblige. Keeping blades sharp will save time and effort, improving the cut quality significantly.
As for cutting the holes, using a 6-inch hole saw attachment can streamline the job. This ensures a perfect circle each time and saves you from the manual finagling.
For assembly tips, remember: patience is key. Take your time to let glue set and paint dry completely. Rushing might cause warps or chips. Stay organized by keeping screws and tools handy but out of walking paths.
In terms of finishes, a polyurethane coating works best when applied in multiple thin layers rather than one thick coat. This approach ensures better protection and an even finish.
Take advantage of online forums and DIY groups. Community pages and YouTube channels are gold mines for troubleshooting and innovation ideas.
For upkeep of your cornhole set, simple care like storing the boards vertically and covering them against bad weather can prolong life and maintain playability. A gentle wipe with a damp cloth will keep the boards looking fresh, and periodic checks for loose screws can prevent game-time mishaps.
With all these resources at hand, feel empowered to customize, tweak, or even teach others about the joys of cornhole-building. Your set might be the start of a fun tradition, sparking DIY enthusiasm and community bonding.
4 responses to “Designing A DIY Cornhole Game Set For Fall Fun”
-
This post brought back so many memories!
My husband built our first cornhole set last fall, and you’re right; there’s nothing quite like the pride of saying, “Yep, we made that ourselves!” He went with a maple leaf design, but now you’ve got me thinking we should try a rustic pumpkin-and-vine theme for this year.
I also second your tip about checking Facebook Marketplace for materials; our boards came from leftover plywood a neighbor was happy to part with. Great guide, and now I’m itching to host a little backyard tournament before the leaves are gone!
-
Thank you for stopping by and reading the post. There is just something about making something yourself. You know its yours and its unique, not another one just like it,
You can get several items for decorations to place on the board or find free wood on facebook market place
-
-
What a delightful read—your cornhole project guide does such a great job walking through material choices, tools, and creative design touches that make the game extra special for fall gatherings. I love how you highlight the personal flair that comes from adding stenciled motifs or weatherproof finishes, turning a simple build into something memorable.
I’ve always loved hands-on creative projects, and cornhole was one of my favorite games when I lived in Florida by the beach. Those sunny afternoons tossing bean bags in the sand were effortless fun, and building my own set now brings back that same laid-back vibe.
Have you found certain designs or finishes that hold up better for outdoor, all-season use—especially in humid or coastal conditions like Florida—while still keeping that fall-themed charm?
-
Hey there Leahrae,
Glad you stopped by and took the time to read and comment on my post. I live not to far from where you lived when you lived in Florida I live in Georgia. So being from there I can tell you that I have many sets of cornhole boards and the best set I made was for a gentleman from Sea Island and a Graduate from University of Georgia. He wanted them made from cedar with a Georgia Bulldog on Each one. So I made them and then finished them with 15 coats of Tung Oil and 5 Coats of Maguires Car Paste Wax. The Bull Dawg Was Stickers.
However I have built many sets of the cornhole boards out of regular plywood and just use a good sealant like polyurethane, tung Oil, a good varnish or Danish oil and I always put several coats of car wax on top of the hardened finish for extra protection and slickness.
-
Leave a Reply